360° Content Creation
Explore best practices for 360° content creation in this guide. Please note that requesting custom skyboxes is a premium paid feature, currently available exclusively to enterprise members.
Creating great 360 content for Virtual Reality
There are many elements that go into creating a great 360 photo or video for use in VR. We'll go over them all here.
Even skilled photographers struggle to create great 360 VR content, so don't be surprised if the recommended requirements seem a little overwhelming for the hobbyist.
While we provide services that can assist in making your 360 VR content work in Multiverse, our goal is that you and your team create great 360 VR content without the need for our help from us.
Generally viewable areas
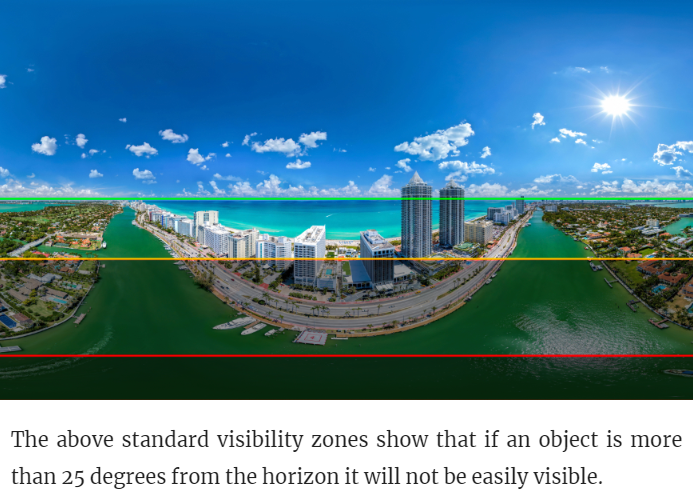
The image shows how much of an equirectangular 360 image is generally visible in our standard rooms. Split into 3 parts, we show:
The easily viewable part,
The part that is viewable when "looking over the edge" of a scene, and
The section that is very difficult to view, even when leaning heavily.
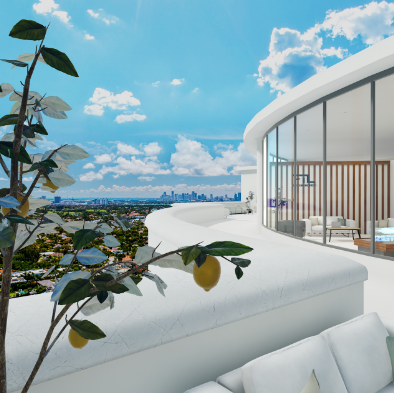
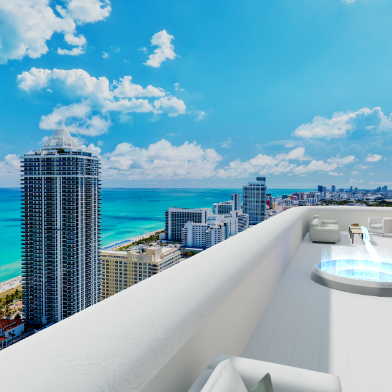
Shots of the above 360 image taken at approx head-height inside Multiverse showing visibility:
-
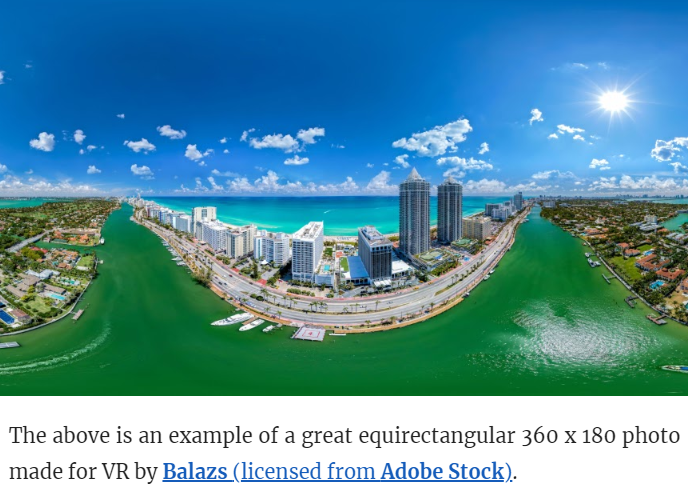
Be wary - a good chunk of stock content that is tagged "360" / "VR", is in fact not really made for VR. A lot of the time you'll find these are panorama photos and not 360 x 180 equirectangular photos - ie they don't wrap around the entire environment in 360 degrees and / or don't cover the entire 180 degree range from ground to sky.
Make sure your content is in fact a full equirectangular 360 x 180 image that wraps the whole way round in both the horizontal and vertical.
Note: A small black hole at the bottom of a great 360 photo is not a deal breaker, as this is often hidden by the floor of the VR environment. But the image should be the right proportions: 2 by 1 (ie it's important that the image have a black bottom section rather than that the image is stretched to cover the gap, as this will warp the image and skew the horizon.
-
If the horizon doesn't sit flat and precisely in the middle of the equirectangular image, then it will feel very wrong in VR. This is an extremely important part of ensuring users feel comfortable within your 360 content. In the worst case, this can cause a user to feel nauseous.
If the horizon isn't centred in the image, the horizon won't be accurate in VR, creating a warped or fish-eye view of the world.
If the horizon isn't flat, then the 360 image will be tilted in VR, this is extraordinarily disconcerting when in VR, and can cause nausea.
Ensuring your content is centred and flat is easily done in modern photo & video manipulation software packages.
-
Nearly all great 360 content is created using either a drone or a stand. These tools help the photographer take great photos where the majority of the shot is of the content, not the photographer.
However while the photographer can hide themselves from view, the stand or drone can not. As a result nearly all 360 footage needs to be manipulated to hide any visual elements of the stand or drone.
With a drone this often means replacing large chunks of the sky. With a stand this means touching up the ground.
Touching up content to remove these elements is easily done in modern photo or video manipulation software packages.
-
You should avoid seams at the edges of the image so that when the image is wrapped into a 360 VR environment the stitching is seamless. When done correctly this means that the user can not tell where the image starts and where it ends.
The main concern is where the right side of the image joins the left side of the image. This is the most common location where a seam occurs and can break the sense of immersion when viewed in VR.
The second concern is where the top and bottom of the image pinches together. This is less of a concern as it is often not seen in VR (people tend not to look directly up), and the ground often covers the bottom. However these are relatively simple problems to solve when managed properly.
Note: If your photo or video has visible seams in the image outside of the edges of the image or video (ie where the image wraps), then it is likely due to the hardware used to create the image in the first place. High quality hardware comes with high quality software that removes these seams by stitching content with intelligent algorithms. These issues are more difficult - or even impossible - to fix.
-
Objects close to the camera distort the sense of scale when they appear close to the camera. We recommend you try to keep at least 30m away if you want to ensure a realistic sense of scale.
This obviously doesn't apply if you are trying to make the user feel small by e.g. placing them inside a fish bowl. Good rules are there to be broken after all.
However, visible objects in a 360 photo that are closer than 30m will feel disproportionately large by comparison to the Multiverse 3D environment, so be wary of this rule, especially if you are trying to create a real world realistic look and feel for your environment.
-
Seeing a static person, bird, flag or airplane in a 360 photo is disconcerting in VR. So, if you are creating a 360 VR photo, avoid - as much as possible - proximity to people, animals, vehicles & other objects that tend to move. If any of these objects are far away in the distance, this is not so much of a problem, but having a seagul hang in mid flight right in the centre of view is a problem.
For longer looping videos these elements are not such an issue, especially if they are far away or the video is long. The can actually help the feel of the video. However, for a short looping video they can quickly become repetitive and break the immersion.
-
When making content for VR, try to get as high quality and resolution as is reasonable for your budget. We can always downscale as needed. But upscaling low quality footage is not as easy.
We recommend a good quality equirectangular image should be at least 12,000 by 6,000 pixels. Some Multiverse users are providing images at 23,000 by 11,500 pixels.
Updated April 3, 2025
